Showing posts with label Merry Christmas. Show all posts

Monday, December 13, 2021

Quick Popup

Hi everyone Happy Monday and oh my, oh my, it's almost Christmas and 2022 so whose ready?! Not me time is going by way too fast for me.  I made this popup Christmas cards for a friend of mine kid who happened to be watching me craft.  She said "oooo make the bear popup" hahha I laughed and so oh ok now that I can do for sure...

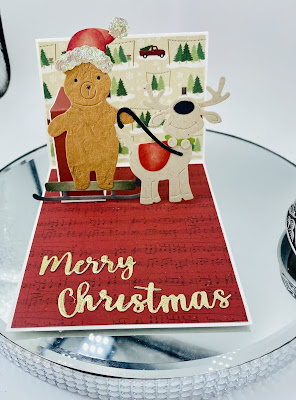
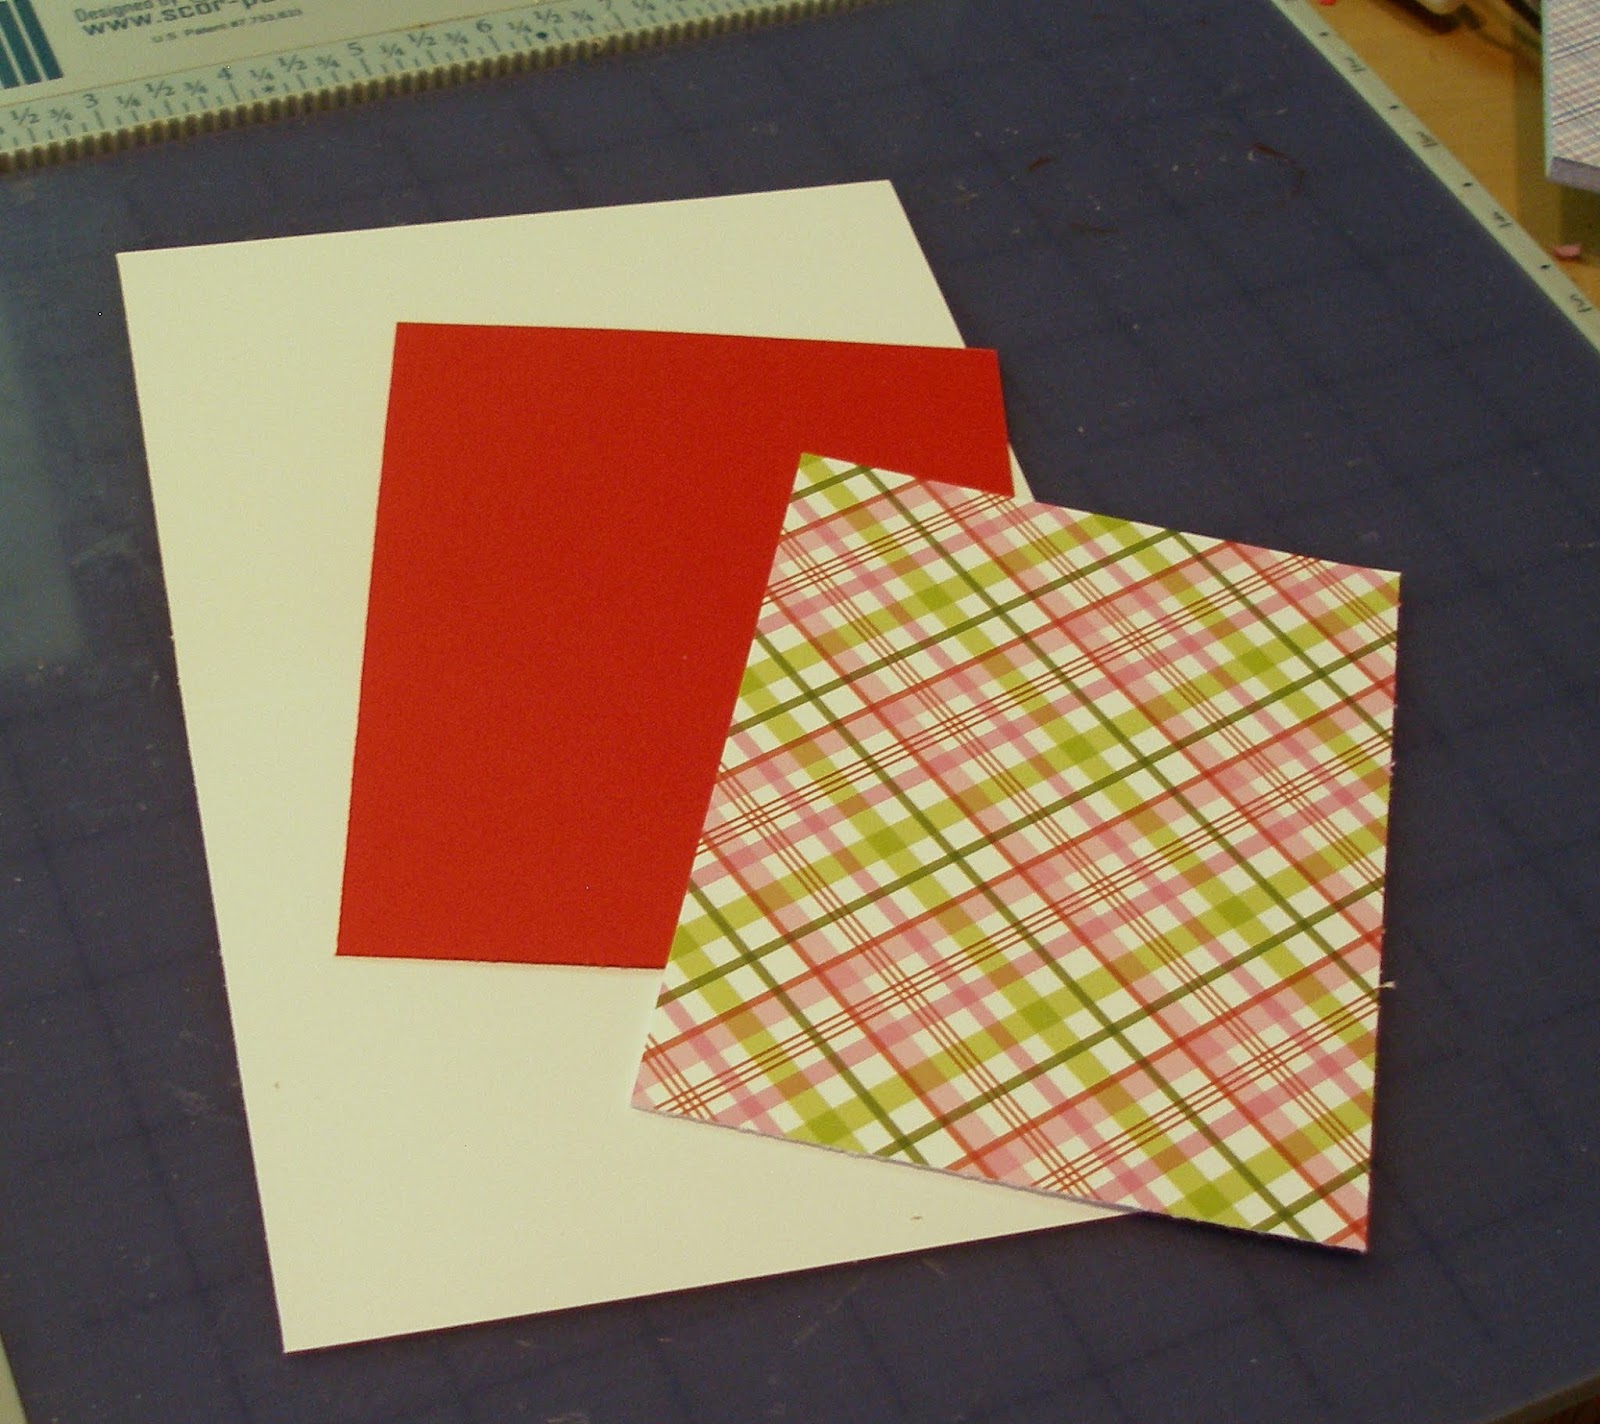
So I created a slimline popup by cutting my card stock to 4 x 8.5 and scored it at 4x5, and then made two other sections at 4 x 3 approximately.  I then covered it with patterned paper that my new helper chose and then made the popup piece by simply folding a piece of paper for it to lean against.
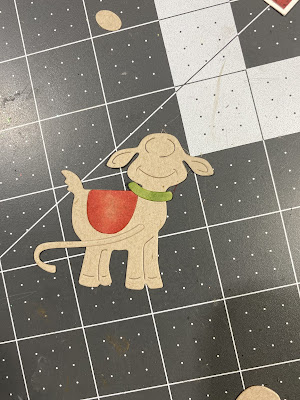
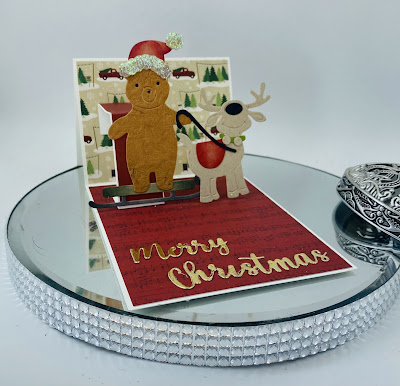
I colored my diecut pieces with my copics and glued them with a twist meaning.  I put the hat on my bear and made the bear pull the reindeer... she thought it was funny so we went with it.
I have started coloring on colored cardstock with my copics I feel this gives it a different look
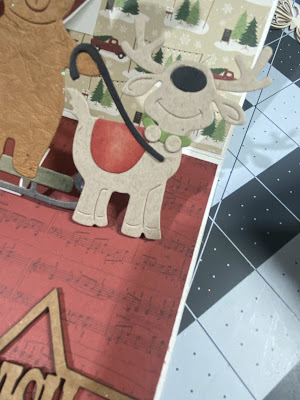
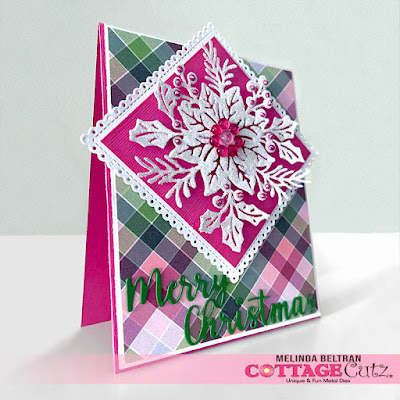
Here is my finished popup card and you can see the piece of paper I adhered to the back of my Santa Bear and walla easy peasy

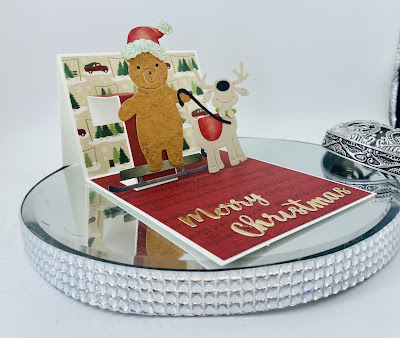
I really love how it came out and I topped it off with the "Merry Christmas" sentiment 
using gold foil paper

In case you didn't hear, The CottageCutz YouTube channel is up and running. We are featuring videos every Wednesday. Drop by and subscribe so you don't miss one and give us a thumbs up on our videos.

Products Used:


Sunday, October 31, 2021

Two Pretty Poinsettia Cards

Happy Sunday Scrapping Cottage friends! I'm so glad you stopped by. Melinda here with another project. Today I am sharing two pretty cards. Both cardst feature the gorgeous Poinsettia and Holly Flower Christmas Die. It is one of the new dies in the Christmas Part 1 release. Now is the perfect time to pick them up! They are 30% off! That is a terrific savings. 

Here is a look at my first card. 


I started by cutting out the beautiful Poinsettia Die Cut from the 1st Christmas Die Release. I covered it with some wet adhesive and then poured some fine, white glitter all over. I set it to dry and then dusted off the excess glitter.

I then used a large 3D glue dot for the middle and cut some little foam squares. This is what I used to adhere the die cut onto the base.

Here you see I adhered the Poinsettia cut to a stitched circle die base I cut from some red cardstock. I adhered that onto a scalloped white circle base. Once it was in place, I used some more wet glue and then adhered some dew drops to the center.


Here's a look at the dew drops I used.

I then used my Nuvo Drops and added some to all the spots on the die cut that were the little little holly berries.


Here's a closer look at the decorated die cut. I love that it has a little lift from the mats.


To finish off the card, I cut the new Merry Christmas sentiment out of some white cardstock. I layered it onto a strip of red cardstock. I adhered both elements to the patterned paper base. From there, I adhered the entire thing onto a black top folding A4 cardstock base.


For the second card, I repeated the same process for the Poinsettia Die Cut. I cut it out of some white cardstock. Glued and glittered it.

I then cut a piece of pink cardstock. I then inked the edges and mounted it onto the Scalloped stitched square base. 
I then added some foam tape to the back side of this mat. 

Here's a photo of the dew drops I used on this card. You can also barely see the Thistle colored stickles glitter glue I used. I dotted all the little holly berry centers.

Here's a closer look at the Merry Christmas die cut. I cut it out of some Green cardstock. I chose not to use the pretty outline that comes with the die.

Here's a closer look at the pretty Poinsettia.

Here's a look at my completed card. For the base, I used a piece of patterned paper I created and printed out. I cut it to a 3.75 x 5 size. I mounted all that onto a piece of white cardstock and then the entire thing is attached to the pretty pink card base. The finished card size is a standard A4 top folding card.

I think my two cards turned out super pretty. I hope you like them. You can easily re-create these cards with the help of these wonderful dies!


The Dies I used to create these projects:


Well that about covers it for today! 

The CottageCutz YouTube channel is up and running. We are featuring videos every Wednesday. Drop by and subscribe so you don't miss one and give us a thumbs up on our videos.

Make sure to come back by each day for some more great crafty inspiration from the super talented team. Don't forget to head over and take advantage of the great savings on these and more of the fabulous Sale!

Be sure to head over and check out the fantastic
CHRISTMAS PART 2 RELEASE!!!!
SOME AMAZINGLY CUTE DIES! 
This release has the Merry Christmas with Shadow die.

CHRISTMAS PART 1 RELEASE!!!!
SOME MORE AMAZINGLY CUTE DIES! 
This release has the Poinsettia die.

Until the next time, have a wonderfully crafty day!

Wednesday, December 25, 2019

Merry Christmas

Hello!  This is Sukie and today I have a Christmas card to share.  I went with a bright and cheery theme with the sweet moose and gnomes on my card.  It was the perfect card to wish everyone a Merry Christmas!
I used the Cottage Cutz Moose Pulling Gnomes Sled and the Merry Christmas die sets.  I used my Oxide Inks to shade all of the die cuts and then layered the sentiment on a hand cut panel.
For my card base, I went a CAS design and embossed the white card stock with the Cuttlebug Snowflake embossing folder.
I layered the embossed paper on top of the snowflake paper to create my card base.  The sentiment panel was angled on the background of my card.
The sled was layered above the sentiment as if the moose was pulling the adorable gnomes down hill.
To finish off my card, I wrapped the top edge with some Cranberry Trendy Twine and tied it together.
Here are the dies used on my card, available in the store:

Monday, October 29, 2018

Merry Christmas from Dakota

Hi, Lois here with my regular Monday post.  The Scrapping Cottage (CottageCutz) has a die in its new Christmas release that is available ONLY on their website.  It will not be available from any other outlets.  Called Dakota the Husky, some of the design team members will be featuring him on our cards this week.  He is really cute!


I used the version of Dakota wearing his Santa hat on my card -- along with some new Christmas plaid paper I just bought last week.


I started my card by cutting out the die pieces from white cardstock.


I then colored him with Copic markers and put him together.


My cardstock measurements are as follows:

White - 5 1/2" x 8 1/2", scored at 4 1/4"
Red - 5 1/4" x 4"
Plaid - 5 1/8" x 3 7/8"


I then cut three ovals using the Cross-Stitched Ovals set.  To save cardstock, the red oval was cut from the center of the 4" x 5 1/4" layering piece.  The plaid oval came from a scrap.


I constructed my card, layered the ovals together, and placed some adhesive foam circles on the back of the oval and Dakota . . .


. . . placing them on the front of the card.


Using a Merry Christmas phrase, I cut the sentiment from dark green cardstock.


After gluing the sentiment on the popped-up oval element, my card was complete.


CottageCutz dies used on my card are:

http://www.scrappingcottage.com/cottagecutzdakotathehuskyexclusive.aspx

http://www.scrappingcottage.com/cottagecutzcross-stitchedovalsetbasics.aspx

http://www.scrappingcottage.com/cottagecutzexpressionsmerrychristmas.aspx