Thursday, April 28, 2016

Happy Mother's Day

Hello everyone,

It's Donna here sharing another beautiful card using the CottageCutz dies!  How many of you have made your mother a card and mailed it? Not me, but we still have about two weeks to get it out. Now onto my card.
  • Card base  is an A2 (4 1/4 x 5 1/2)
  • Top layer is 4 1/4 x 5 1/2
  • Center pieces are 4 1/4 x 1 1/2 
I die cut the two butterflies and pieced them together. I cut out two circles from the cross-stitched circle dies.  I used the 5th and 6th circles.  The larger circle is with the blue butterfly and the smaller is with the pink butterfly. I adhered them to my card with a glue dot and added my butterflies. I die cut the Happy and Mother's Day out with black cardstock, added some clear wink of stella then used liquid glue to adhered them to my card. I finished my card off by adding some sequins.


Don't forget to join the CottageCutz challenge...click here for all the details. Please come back and see us again soon!

List of dies used for this project:


Wednesday, April 27, 2016

~Happy Spring~


Hello Scrapping Cottage Friends! Thanks for taking the time to stop and visit today. It's Mary Marsh here bringing you the Wednesday edition of the Blog.

For your viewing pleasure, I am showcasing one of the new April release dies and also demonstrate how you can take a single die and add layers, a little embossing and some created embellishments to dress up the card.

Let's get started with some details on how I created this card:

cardstock and patterned paper sizes:
daffodil card base measures 4 1/4" x 11" and scored at 5 1/2"
pomegranate embossed layer  is 4 1/8" x 5 3/8"
patterned paper layer is 3 1/8 x 4 3/8"

I used a flower embossing folder that just embosses around the cardstock edge. Thereby creating a perfect frame for the next layer where I used my patterned paper.

I used the new large leafy flourish and cut 2 of them in a dark green card stock. I added an extra swirl at the top right and some extra leaves on the middle left.  That just helped create balance on my card. This is adhered with multi matte medium. It's a strong adhesive and it dries clear unlike glossy accents.
To continue building my card, I cut some flowers from the mushroom & flowers die in daffodil and pomegranate.

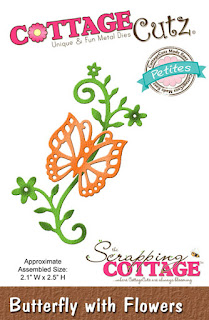
My sentiment was stamped before I attached all the die cuts in a dark green ink. It makes it easier for placement to do that first. To finish off my card I added a butterfly cut from the butterfly with flowers die. I cut it once in daffodil cardstock and then in a daffodil patterned paper. I used the multi matte medium to attach just in the middle. That way I was able to lift the wings for added dimension. The solid butterfly is glued directly to the patterned paper layer.


Well Friends that's my card for today. I hope this provided some inspiration for you. The April release is filled with  awesome dies to help you create some gorgeous floral cards. Check it out.

Just a little reminder, it's not to late to enter our brand new challenge. There are prizes to be won. Check out all the details here.

So until next time.........inky hugs!


http://www.scrappingcottage.com/cottagecutzlargeleafyflourishelites.aspx
http://www.scrappingcottage.com/cottagecutzmushroomandflowers4x4pre-order.aspx
http://www.scrappingcottage.com/cottagecutzbutterflywithflowerspetites.aspx


Tuesday, April 26, 2016

Card with flowers in a box

Hi everyone, Janja here!

For today's post, I used one die from each of this year's releases and prepared the card in a box. I like to combine dies with each other. 


For the card we need:
  • white card base: 10.6" x 5.3", folded
  • black cardstock: 5" x 5"
  • two patterned paper: 4.8" x 4.8" and 4.8" x 2"
  • white and color cardstock
  • texture paste and stencil
  • stamp
  • embossing ink and white embossing powder
  • heat gun
  • white pigment ink pad
  • white pearl cardstock and transparent foil for the box
We prepare several cutouts with the die 3D flower #5.


The cutouts are molded with a shaping tool and assembled. 


Once we have selected patterned paper and cardstock trimmed to the desired size, we cut out a hole in the smallest of them in the form of an oval with a die from the basic set oval (4th die from the center).
Place a stencil on paper and apply texture paste over it with a spatula. 


While the textural paste is drying, we cut out another oval from black cardstock. We stamp the sentiment and treat it with hot embossing technique. The edges of the oval are shaded with white pigment ink. 
We place cutout, which is now seen as a blackboard, in the previously prepared hole. The edges are masked with a white oval frame. We use the basic die sets: an oval and stitched oval (4th die from the center).


With nets cutouts we enliven the background of the card. At the end glue flowers and greenery (the leafy vines die and the Lacey rose die). 


When a card is delivered in person, it's best if it is stored in a box. 
A box is made 0.40" greater than the base card. The height is 0.79". In the box cover we cut out the opening (4.5" x 4.5") and on the inner side of the box cover clamp foil, with double-sided adhesive tape. At the end, decorate the box cover. 
Our card is now neatly and securely stored. 


And don't forget on our April challenge - anything goes. You still have time to share your projects with us till the end of the month.

Dies, which I used at work: 


Thanks for looking. 

Janja

Sunday, April 24, 2016

Spring Home-decor with CottageCutz-dies

Hello friends!
Yuliya here and today I share with you another project made with the CottageCutz dies. I make the Spring home-decor: toppers with the 3D flowers!
Let's see how it is made. It's easy and beautiful!

Supplies:
- CottageCutz 3D Flower 3
CottageCutz Spring Bunny Egg (Elites)
- White cardstock for cut - 2 pc A4
- Patterned Paper
- glue and Glossy accents
- ribbon
- wooden skewers

1.Prepare some die-cuts. I use CottageCutz 3D Flower 3  and  CottageCutz Spring Bunny Egg (Elites)
 2. Here is how I put the flower together. The flower has 4 pieces. I die cut them out with paper. I used my special tool to curl the edges to get the fibers lose.
 3.  I use Glossy accents and  "deco-topping"
 Here is the finished flowers.

4. Glue the details
5. Tie ribbons

6. Our toppers are ready
How about bunnies?)))

This was a gift for my brother at Easter!

I hope you enjoy the tutorial and will be happy to inspire you!
Also, did you know that we are having a challenge for our fans and followers to display the cards you have made with CottageCutz dies? There are prizes to be won as well.Click here for all the details. I hope you will join in on the fun!


Saturday, April 23, 2016

VELLUM BLOOMS WITH ANITA KEJRIWAL


Hello friends,

Its saturday today and I hope you all are set to enjoy your weekend. Let there be lots of crafting on your table. I too have planned a super weekend with lot of projects in the queue. But first, let me share with you this delicate card adorned with vellum blooms. Vellum imparts an elegance to any flower ..so soft, so gentle. Hence, I love making these and have brought for you a card where the blooms are made with CottageCutz 3D flowers die set , both in 3D form and also as a background.

So have a look at this cool coloured card.


Instructions
 1. The card base measures 5 inches by 7 inches.                    
                                         2. Cut a mat layer in white card stock measuring 4.75 inches by 6.75 inches.                    
Adhere to the base using foam tape. 
                                       3.   Add a coloured patterned paper measuring 4.5 inches and 3.5 inches and add it to the bottom part of the mat layer.
             4.Apply Distress ink Picked Raspberry and Dusty Concord on vellum 
 5.   Cut out die cuts from CottageCutz 3D flower #7. 
                6. Keep aside four large and two medium die cuts for the main flowers and 
                                adhere the rest on the top portion of mat layer using Art Glitter glue as shown
in the picture below.


                            7.Cut two die cuts from the CottageCutz stitched Wide Rectangle Frame Set 
adhere to the front using foam tape.
       8. Now make the flowers by shaping them with embossing tool.                       
                     9.   Layer two large and one medium flower together to make one flower. 
                                10. Add pearls in the center. The leaves are again cut from green coloured vellum from the CottageCutz Plumeria die set.                         
                   11.Add the Expression Hello from the CottageCutz Expressions Hello Die 
12. Add a bow twine and pearls to complete the card.


Do visit the CottageCutz blog for all the details. There is a fabulous challenge going on there with awesome prizes. Do share your work with us. I hope you enjoyed being here. Thanks for stopping by


CottageCutz 3D flower #7